


Building a custom in-ground pool is one of the most significant investments a homeowner can make in their property. Concrete swimming pool construction stands as the industry gold standard, offering unmatched design flexibility, structural durability, and long-term value compared to prefabricated alternatives. Unlike vinyl liner or fiberglass pools that arrive with predetermined shapes and sizes, concrete pools allow homeowners to create truly custom designs that complement their landscape, architectural style, and entertainment needs. The process involves multiple specialized trades working in sequence, from excavation crews to steel workers, plumbers, shotcrete operators, and finish applicators. Understanding each phase of construction helps homeowners make informed decisions, set realistic timelines, and ensure their project meets both building codes and personal expectations.
The Engineering Foundation of Concrete Pool Design
Concrete swimming pool construction begins long before the first shovel breaks ground. The design and engineering phase establishes the structural integrity, hydraulic efficiency, and aesthetic character of the finished pool.
Site Assessment and Soil Analysis
Every successful pool project starts with a thorough evaluation of site conditions. Geotechnical engineers assess soil composition, bearing capacity, and groundwater levels to determine appropriate foundation design. In Los Angeles and surrounding areas, soil conditions vary dramatically from stable decomposed granite in hillside locations to expansive clay in valley floors.
Critical site factors include:
- Soil type and load-bearing capacity
- Groundwater level and seasonal fluctuation
- Slope stability and drainage patterns
- Underground utility locations
- Setback requirements and easements
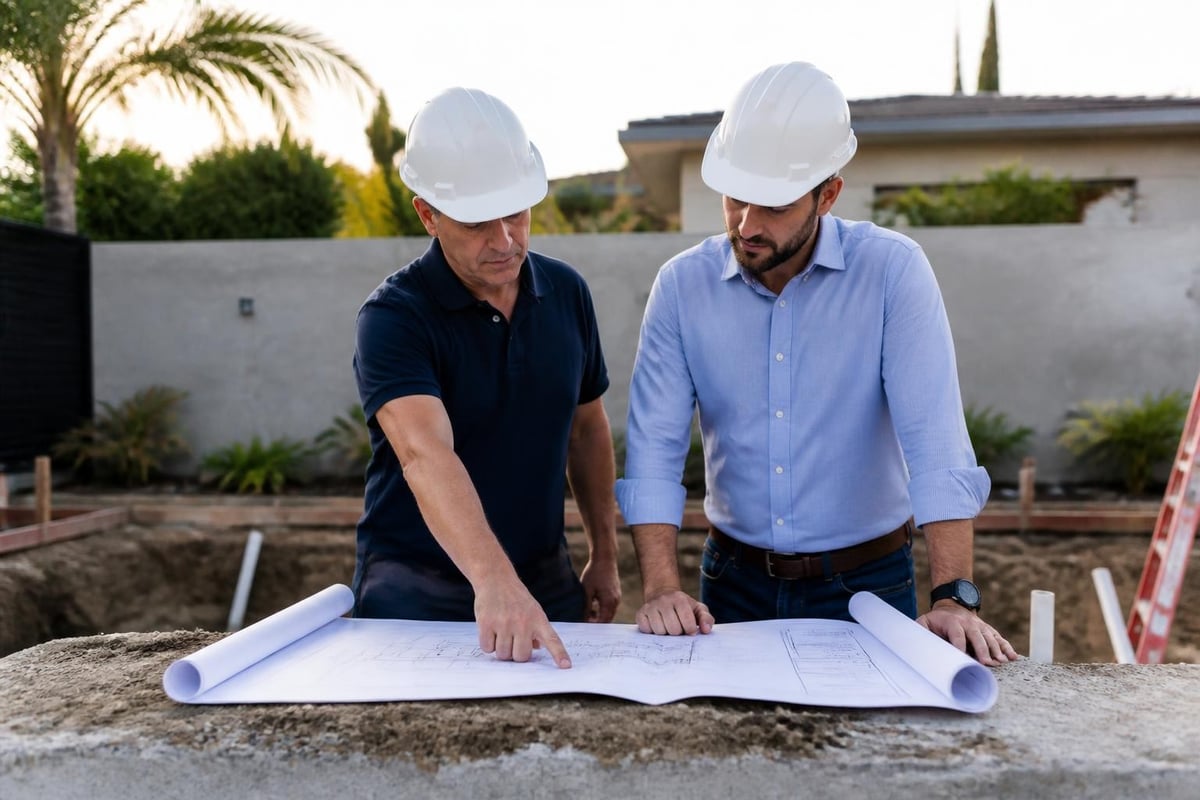
The engineering drawings specify shell thickness, reinforcement schedules, and construction details that ensure the pool withstands hydrostatic pressure, soil movement, and seismic forces. Structural design considerations for concrete pools must account for local building codes and environmental conditions unique to each site.
Permit Process and Code Compliance
Concrete swimming pool construction in Los Angeles requires multiple permits coordinating building, plumbing, electrical, and gas departments. The permit application package includes engineered plans, energy compliance documentation, and barrier specifications meeting current safety codes.
| Permit Type | Requirements | Typical Timeline |
|---|---|---|
| Building | Structural plans, energy compliance, barrier details | 3-6 weeks |
| Plumbing | Equipment schedules, pipe sizing, backflow prevention | 2-4 weeks |
| Electrical | Bonding/grounding plan, GFCI protection, lighting | 2-3 weeks |
| Gas (if applicable) | Heater specifications, pipe sizing, shutoff valves | 2-3 weeks |
Working with a licensed general contractor who specializes in in-ground pool construction ensures all documentation meets current codes and streamlines the approval process.
Excavation and Underground Infrastructure
Once permits are approved, the physical construction begins with precision excavation that establishes the pool's footprint and depth profile.
Layout and Excavation Methods
The layout crew transfers engineered dimensions from plans to the actual site using laser levels, string lines, and marking paint. Excavation depth must account for structural shell thickness, plumbing trenches, and final finish materials.
Modern excavation equipment allows operators to sculpt complex shapes including beach entries, therapy benches, and integrated spas. The excavation process removes significantly more soil than the pool's water volume due to shell thickness and perimeter room for steel placement and shotcrete application.
Soil disposal considerations:
- Soil export costs vary by volume and haul distance
- Compacted fill may be retained for landscaping
- Access limitations affect equipment selection
- Environmental regulations govern disposal sites
Plumbing Rough-In and Testing
Underground plumbing installation occurs immediately following excavation while the soil remains workable. The plumbing system includes main drains, skimmers, return lines, suction lines, and dedicated cleaner lines, all sloped and positioned according to hydraulic design.
Professional installers use schedule 40 PVC pipe with solvent-welded joints, avoiding threaded connections that could fail underground. Each line is independently pressure-tested to 35 psi minimum for 24 hours before concrete encasement, ensuring leak-free operation for decades.
Equipment pad plumbing connects to the pool shell through the bond beam or pool wall, with careful coordination to avoid conflicts with steel reinforcement. All penetrations receive proper waterproofing details specified in the structural drawings.
Steel Reinforcement and Structural Framework
The reinforcement phase transforms an excavated hole into a precisely engineered structural vessel designed to contain thousands of gallons under constant pressure.
Rebar Installation and Spacing
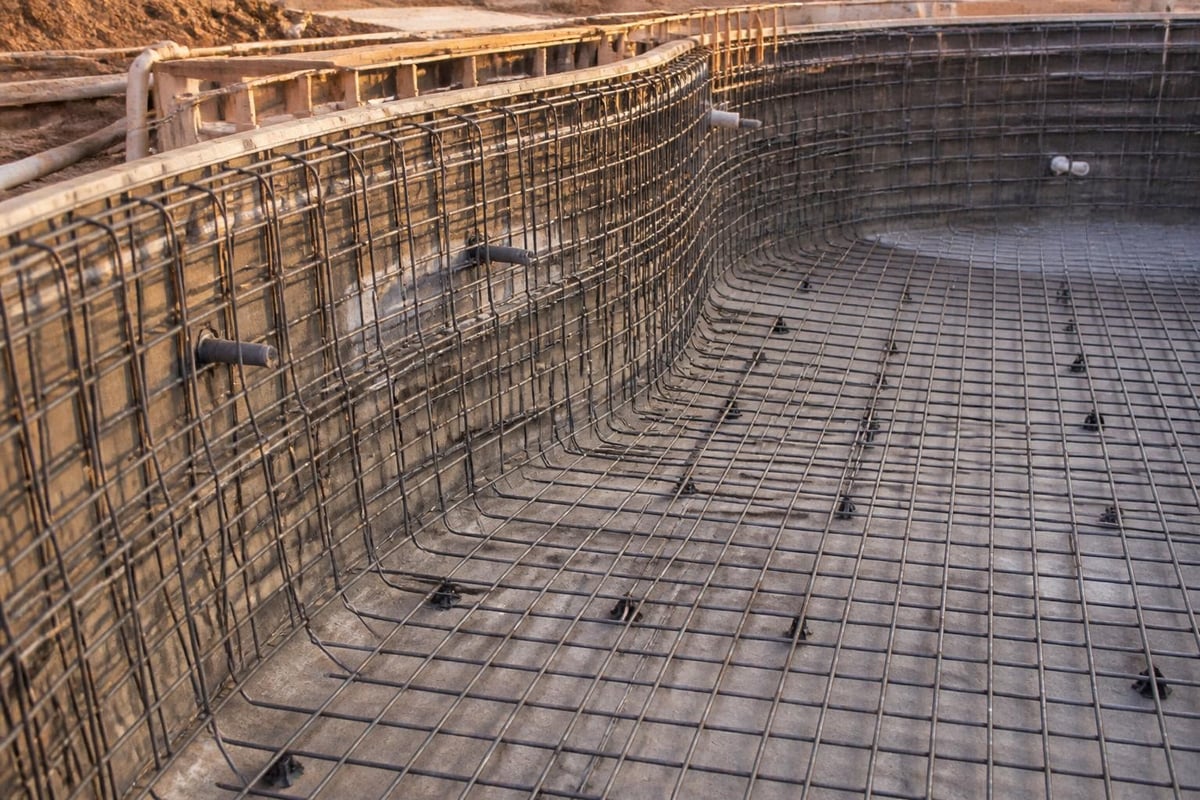
Concrete swimming pool construction relies on continuous steel reinforcement grids providing tensile strength that plain concrete lacks. Steel workers install #3 or #4 rebar on 8-inch to 12-inch centers both vertically and horizontally, creating a three-dimensional cage that follows every contour of the pool shape.
The reinforcement must maintain proper concrete cover (typically 3 inches minimum) to prevent corrosion while providing adequate embedment for structural performance. Chair supports, bolsters, and tie-wire hold steel in position during shotcrete application.
Critical reinforcement zones:
- Bond beam (perimeter top edge requiring extra steel)
- Steps and benches (reinforced to prevent cracking)
- Spa/pool transition (structural connection points)
- Equipment penetrations (reinforcement framing)
Additional reinforcement concentrates at corners, changes in direction, and areas experiencing concentrated loads. The American Concrete Institute guidelines for shotcrete in pool construction provide detailed specifications for reinforcement placement and concrete cover requirements.
Electrical Bonding System
Before shotcrete application, electricians install a continuous #8 copper bonding conductor connecting all metallic components within 5 feet of the pool. This bonding grid includes reinforcing steel, metal handrails, light fixtures, equipment, and water features, creating equipotential bonding that prevents shock hazards.
The bonding system ties into the home's grounding electrode system but serves a different purpose than grounding. Proper bonding eliminates voltage gradients in and around the pool regardless of equipment grounding status.
Shotcrete Application and Shell Formation
The shotcrete phase represents the most critical construction milestone, when the structural shell is pneumatically applied in a single continuous operation.
Gunite vs. Shotcrete Material Differences
The terms gunite and shotcrete are often used interchangeably in pool construction, though they technically describe different mixing methods. Gunite uses dry cement and sand mixed with water at the nozzle, while shotcrete premixes all ingredients including water before pneumatic delivery.
Modern concrete swimming pool construction predominantly uses wet-mix shotcrete, which provides better quality control, reduced dust, and more consistent hydration. The mixture typically includes cement, sand, aggregate, pozzolanic admixtures, and water proportioned to achieve 4,000-5,000 psi compressive strength.
| Characteristic | Wet-Mix Shotcrete | Dry-Mix Gunite |
|---|---|---|
| Water control | Precise batching | Nozzle operator discretion |
| Dust generation | Minimal | Significant |
| Quality consistency | Excellent | Variable |
| Accelerator use | Lower dosage | Higher dosage |
The American Shotcrete Association pool FAQs explain technical differences and performance expectations for each method.
Application Process and Quality Control
Shotcrete crews begin application at the pool bottom, working upward in continuous passes that build 3 to 6-inch shell thickness. The nozzleman maintains a perpendicular spray angle, compacting material into the reinforcement while minimizing rebound (overspray that falls away).
Experienced crews achieve excellent compaction without voids or delamination. The finish depends on the specified interior surface, with smoother troweling required for aggregate finishes and rougher texture acceptable beneath tile or plaster.
Quality indicators during application:
- Consistent thickness meeting structural drawings
- Complete steel encasement without exposure
- Minimal rebound and proper compaction
- Smooth bond beam top for coping installation
- Clean plumbing penetrations and fittings
Safety protocols follow OSHA concrete construction guidelines, including respiratory protection for silica dust, fall protection, and proper equipment maintenance. Professional crews maintain clean work areas and protect surrounding property from overspray.
Curing, Waterproofing, and Deck Preparation
Following shotcrete application, the shell requires proper curing to achieve design strength and durability before backfilling and deck construction.
Hydration and Strength Development
Concrete strength develops through a chemical hydration process requiring adequate moisture and favorable temperature for at least seven days. Crews spray the shell multiple times daily, maintaining damp conditions that prevent rapid drying and surface cracking.
Proper curing dramatically affects long-term durability, influencing shotcrete resistance to carbonation, chloride penetration, and chemical attack throughout the pool's service life. Inadequate curing results in weak surface zones susceptible to spalling and deterioration.
Deck and Coping Installation
The perimeter deck provides functional access and aesthetic framing for the pool. Deck options range from poured concrete to natural stone, pavers, and decorative coatings. When choosing materials for the hardscape surrounding the pool, homeowners should consider slip resistance, heat reflectivity, and maintenance requirements.
Coping creates the finished edge between water and deck, available in precast concrete, natural stone, brick, or cantilevered concrete. The coping installation establishes the pool's visual profile and provides a smooth edge for swimmers.
- Bond beam must be level and properly dimensioned
- Coping material should complement architectural style
- Proper slope directs deck drainage away from pool
- Control joints prevent random cracking in concrete decks
- Expansion joints allow movement at pool perimeter
Equipment Installation and Hydraulic Systems
The mechanical systems that circulate, filter, heat, and sanitize pool water require professional installation coordinating plumbing, electrical, and gas trades.
Filtration and Circulation Equipment
Modern pool equipment includes variable-speed pumps, high-efficiency filters, automated chemistry controllers, and energy-efficient heaters. Equipment selection balances performance requirements, energy costs, and automation preferences.
The circulation system must turn over the entire pool volume in 6-8 hours, with pump sizing based on hydraulic calculations accounting for pipe friction, vertical lift, and equipment head loss. Oversized pumps waste energy while undersized units provide inadequate filtration.
Equipment selection factors:
- Pool volume and turnover requirements
- Hydraulic head calculations and pipe sizing
- Energy efficiency ratings and operating costs
- Automation capabilities and user interface
- Warranty coverage and service availability
Safety and Compliance Features
All electrical components require ground-fault circuit interrupter (GFCI) protection and proper bonding per current National Electrical Code. Lighting operates on low-voltage transformers positioned outside the pool equipment area with clearly marked disconnects.
Modern safety equipment includes automatic covers, perimeter fencing with self-closing gates, door alarms, and anti-entrapment drain covers meeting current standards. The layered protection approach significantly reduces drowning risk when properly implemented and maintained.
Interior Finish Options and Surface Selection
The interior surface provides the waterproof barrier, aesthetic appearance, and tactile experience for swimmers. Finish selection involves balancing appearance, durability, maintenance, and budget.
Plaster and Aggregate Finishes
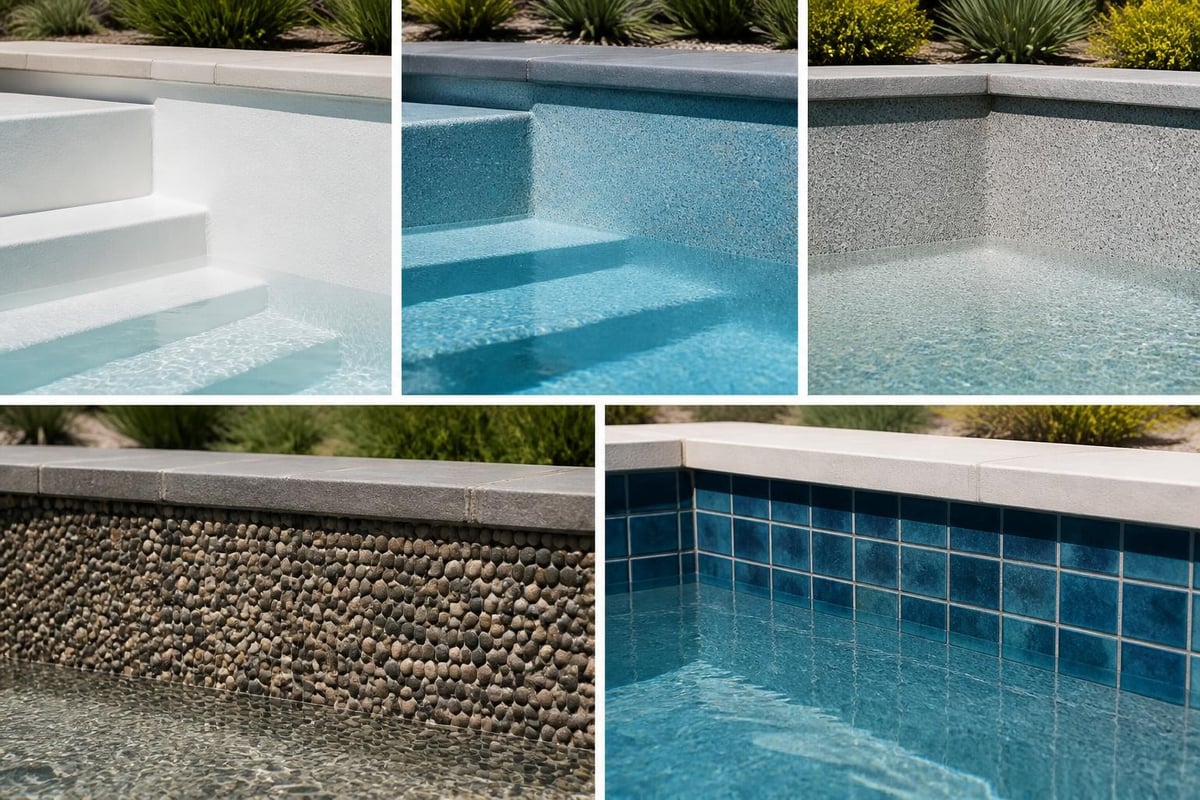
Traditional white plaster remains the most economical finish, providing a smooth, bright surface lasting 7-15 years with proper water chemistry. Enhanced plaster formulations incorporate pozzolanic additives improving resistance to staining and etching.
Aggregate finishes blend white cement with quartz, glass beads, or natural pebbles, creating textured surfaces with superior durability and varied color options. These premium finishes typically last 15-20 years, justifying higher initial costs through extended service life.
| Finish Type | Lifespan | Texture | Cost Level | Maintenance |
|---|---|---|---|---|
| White plaster | 7-15 years | Smooth | $ | Moderate |
| Colored plaster | 8-12 years | Smooth | $$ | Moderate-High |
| Quartz aggregate | 12-18 years | Medium | $$$ | Low-Moderate |
| Pebble finish | 15-20 years | Textured | $$$$ | Low |
Tile and Decorative Elements
Waterline tile at the pool perimeter provides a decorative accent while marking the water level and simplifying cleaning. Glass tile, porcelain, and natural stone options range from subtle to dramatic, complementing the overall design aesthetic.
Interior tile applications include full-tile pools, accent bands, step markers, and custom mosaic artwork. While labor-intensive and expensive, full-tile interiors provide unmatched longevity and visual impact for luxury installations.
Timeline Expectations and Project Coordination
Concrete swimming pool construction typically requires 10-16 weeks from excavation through startup, though timelines vary based on project complexity, weather, permit processing, and material availability.
Typical Construction Sequence
Understanding the construction sequence helps homeowners anticipate disruption, coordinate related projects, and plan completion timelines. Each phase requires inspection and approval before subsequent work begins.
Standard construction timeline:
- Layout and excavation (2-4 days)
- Plumbing rough-in (2-3 days)
- Steel installation (3-5 days)
- Pre-shotcrete inspection (1 day)
- Shotcrete application (1 day)
- Curing period (7-10 days)
- Tile and coping (3-7 days)
- Equipment installation (2-4 days)
- Deck construction (5-10 days)
- Plaster/finish (1-2 days)
- Startup and training (1 day)
Weather delays, inspection scheduling, and material lead times extend timelines beyond the minimum construction duration. Experienced contractors build contingency into schedules while maintaining quality standards that ensure long-term performance.
Coordination with Related Projects
Many homeowners combine pool construction with comprehensive backyard remodeling projects including outdoor kitchens, fire features, landscaping, and hardscape elements. Coordinating these elements during initial design prevents conflicts and creates cohesive outdoor living spaces.
Sequential scheduling addresses equipment access, material delivery, and trade coordination. For example, major landscape grading should occur before final deck installation, while lighting and irrigation coordinate with hardscape layout.
Cost Factors and Budget Planning
Concrete swimming pool construction represents a significant financial investment ranging from $60,000 to $150,000+ for typical residential projects in Los Angeles. Understanding cost drivers helps homeowners establish realistic budgets and make informed design decisions.
Base Construction Costs
The structural pool shell (excavation, steel, shotcrete, plumbing, equipment, and basic finish) represents approximately 60-70% of total project costs. Size, depth, shape complexity, and access limitations directly impact these base costs.
Primary cost variables include:
- Pool size and volume (larger pools cost more)
- Shape complexity (rectangles cost less than free-form)
- Depth and features (deep ends and benches add cost)
- Site access (hillside or restricted access increases expense)
- Soil conditions (poor soil requires engineering solutions)
Upgrade features including spas, waterfalls, beach entries, tanning ledges, and perimeter overflow systems add incremental costs ranging from $5,000 to $40,000+ depending on complexity and scale.
Equipment and Finish Selections
Equipment quality and automation level significantly affect both initial investment and long-term operating costs. Energy-efficient variable-speed pumps, LED lighting, and automated chemistry systems require higher upfront expenditure but reduce monthly operating expenses.
Premium finishes, custom tile work, and specialty coping materials can add $10,000-30,000 to baseline costs. These aesthetic investments provide differentiation and personal satisfaction but don't necessarily increase pool longevity compared to quality standard finishes.
Quality Assurance and Long-Term Performance
The longevity and performance of concrete swimming pool construction depends on specification compliance, skilled installation, and proper initial startup procedures.
Inspection Points and Testing
Throughout construction, inspections verify compliance with approved plans and building codes. Critical inspection points include pre-shotcrete steel placement, plumbing pressure tests, electrical bonding, and final barrier compliance.
Homeowners should document each construction phase through photographs, retain all inspection reports, and obtain warranty documentation from contractors and material suppliers. This record proves valuable for future service work and potential property sales.
Water Chemistry and Maintenance
Proper water chemistry prevents finish deterioration, equipment corrosion, and premature aging. The California Department of Transportation shotcrete specifications provide technical guidance on concrete protection applicable to pool construction.
Initial startup includes acid washing to remove plaster dust, gradual chemical balancing to prevent finish damage, and thorough equipment training for homeowners. Professional service during the first weeks establishes proper chemistry baselines and prevents common startup errors that cause lasting damage.
Essential chemistry parameters:
- pH: 7.4-7.6 (prevents plaster etching or scaling)
- Total alkalinity: 80-120 ppm (buffers pH changes)
- Calcium hardness: 200-400 ppm (prevents aggressive water)
- Free chlorine: 1-3 ppm (sanitizes without bleaching)
- Cyanuric acid: 30-50 ppm (stabilizes chlorine outdoors)
Concrete swimming pool construction combines engineering precision, skilled craftsmanship, and quality materials to create durable, custom water features that enhance property value and lifestyle for decades. Understanding the construction process, material options, and quality standards empowers homeowners to make informed decisions throughout their project. For Los Angeles homeowners ready to begin their custom pool project, AM BUILDS CA brings 15+ years of licensed expertise in concrete pool construction, handling every phase from design and permits through shotcrete, finishes, and startup. Contact us at (424) 485-4548 for a free, no-obligation estimate.


